xPlora: Stopwatch
Introduction
On your marks, get set, go! It's time to see how fast you can run from here to the tree. Or perhaps you want to challenge yourself how fast you can do the math tables. Can you beat two minutes?
With a stop watch, you can challenge yourself or better still have a little bit of friendly competition with your friends while bringing an element of fun and excitement. It is simple, easy and fun to use. Simply press start when you get started, stop when you are finished and reset to start the stopwatch over again.
There are a lot of fun ways that you can use a stopwatch to race against each other or just against the clock. Better still it can help you develop a sense of time and become better at estimating how long you can take to do a certain task.
Can you think of different ways you can use a stopwatch?
Build the project
In this section, we will learn how to build the Stopwatch Project on our UNDA.Xplora breadboard.
Components
For this project you will need the following components.
| Component | Description |
|---|---|
| 2 x Pushbutton |  |
| 2 x resistor (10 kilo-ohm) |  |
| 3 x jumper wire |  |
| 3 x breadboarding jumper wires |  |
| 1 x battery connector |  |
| 1 x battery |  |
| 1 x Unda Xplora |  |
Step 1
Placing the Pushbuttons
- Step
- Build
-
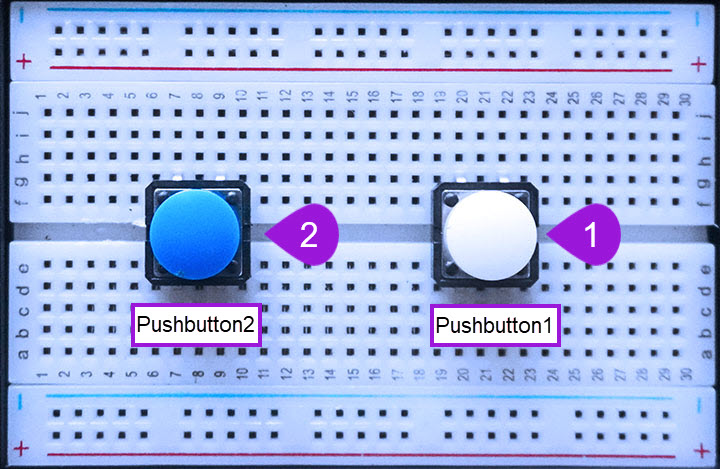
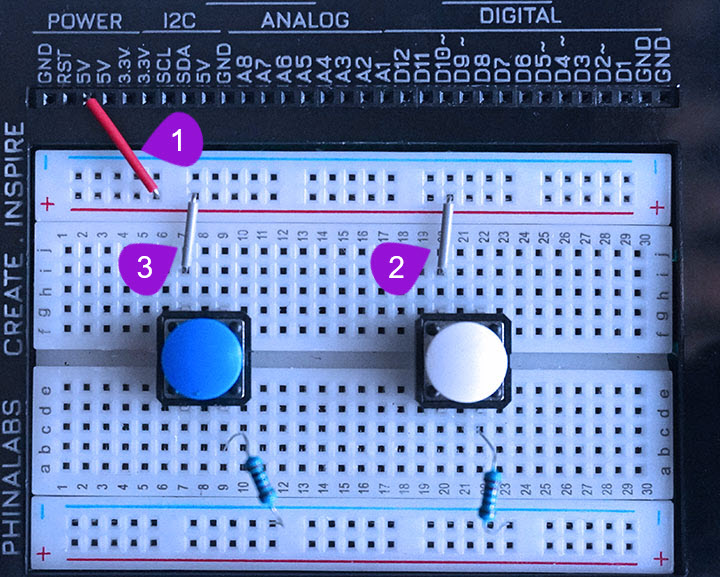
Connecting pushbutton1: Take one pushbutton and connect it's two top pins into pin g20 and pin g22. Insert the two bottom pins into pin d20 and pin d22. It is worth noting that as long as the top pins are inserted correctly, the bottom pins will easily insert into their respective pins.
-
Connecting pushbutton2: Take another pushbutton from the kit and connect it's top pins into pin g7 and pin g9. Insert the bottom pins of the pushbutton into pin d7 and pin d9.
Step 2
Connecting each pushbutton to a resistor
- Step
- Build
-
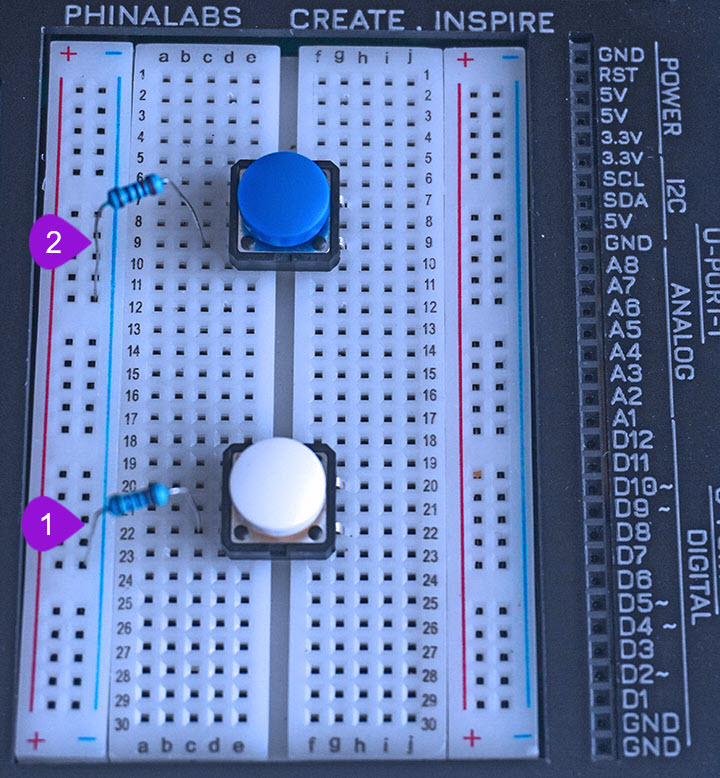
Connecting pushbutton1 to a resistor : Take one 10 Kilo-ohm resistor from your kit. Insert one of it's leg into any pin of the bottom negative breadboard rail. Insert the other leg of the resistor into pin c22 of the breadboard next to one of the bottom pins of pushbutton1.
-
Connecting pushbutton1 to a resistor : Take one 10 Kilo-ohm resistor from your kit. Insert one of it's leg into any pin of the bottom negative breadboard rail. Insert the other leg of the resistor into pin c9 of the breadboard next to one of the bottom pins of pushbutton1.
Step 3
Connecting each pushbutton to power (5V)
- Step
- Build
-
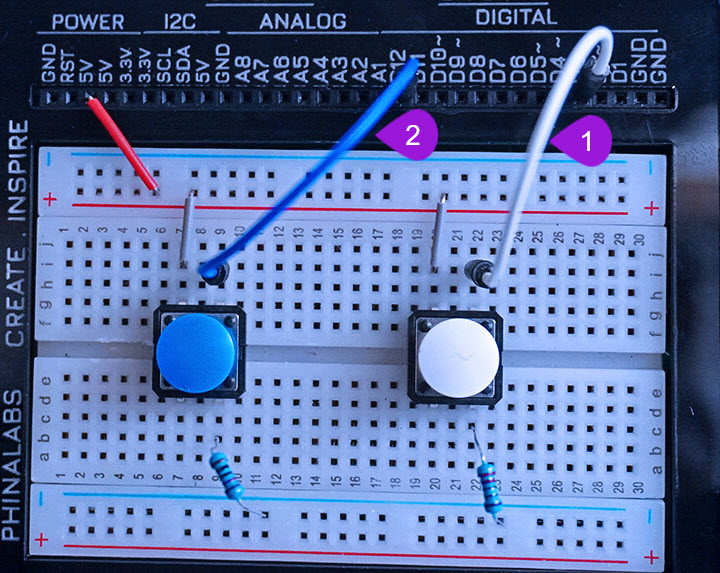
Connecting from 5V Pin: Take one breadboarding jumper from your kit. Insert one of it's leg into any 5V pin of your UNDA.Xplora. Insert the other leg of the into any pin of the top positive breadboard rail.
-
Connecting power to pushbutton1: Using another breadboarding jumper wire connect pushbutton1 to power (5V). This can be achieved by plugging one end of the breadboarding jumper wire into any pin of the top positive breadboard rail and plugging the other end into pin i20 of the breadboard. Ensure the second end of your conencting wire is correctly inserted into pin i20.
-
Connecting power to pushbutton2: Using another breadboarding jumper wire connect pushbutton2 to power (5V). This can be achieved by plugging one end of the breadboarding jumper wire into any pin of the top positive breadboard rail and plugging the other end into pin i7 of the breadboard. Ensure the second end of your conencting wire is correctly inserted into pin i7.
Step 4
Connecting the pushbuttons to digital pins
- Step
- Build
-
Connecting pushbutton1 to D3: Using a jumper wire from your kit, plug one of the leads of the jumper wire into digital pin D3. Plug the other leg into pin i22 of the breadboard next one of the top pins of the pushbutton1.
-
Connecting pushbutton2 to D12: Using a jumper wire from your kit, plug one of the leads of the jumper wire into digital pin D12. Plug the other leg into pin i9 of the breadboard next one of the top pins of the pushbutton2.
Step 5
Connecting the GND Pin
- Step
- Build
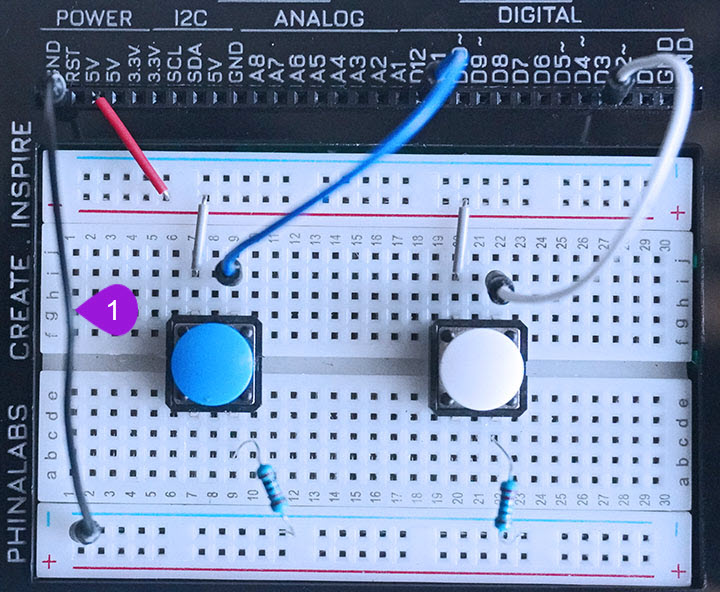
- Connecting to GND (Ground): Take another jumper wire from your components casing. Plug one leg into any GND pin of the UNDA.Xplora. Plug the other leg into any pin of te bottom negative breadboard rail.
Run the Project
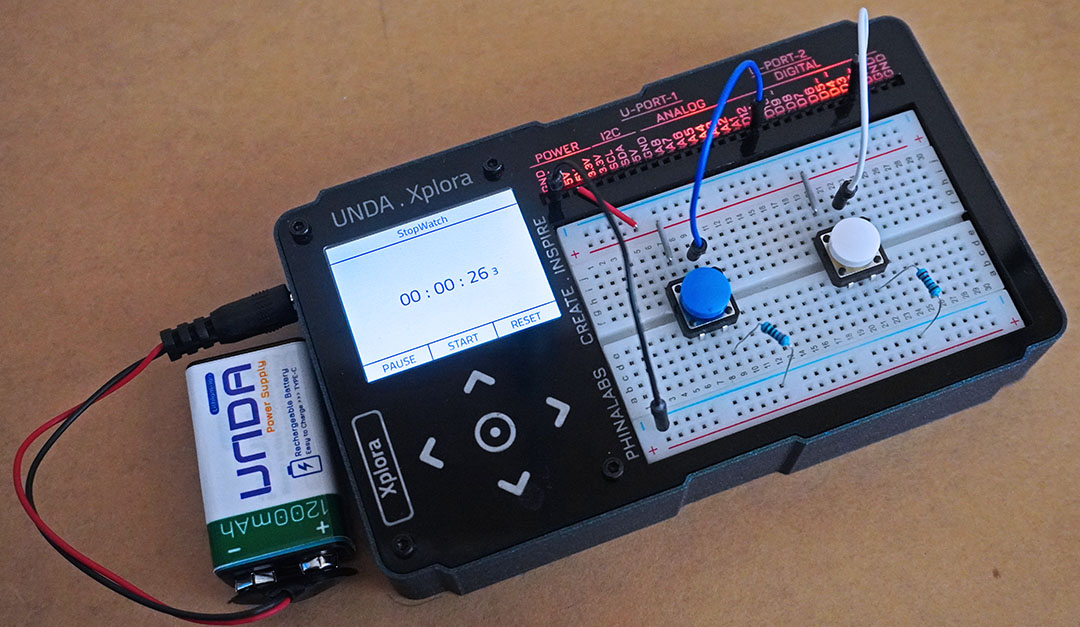
Once you are done building the project, connect the battery to the the battery connector and then plug it to the power port of your Unda Xplora to power it on.
Follow the steps below to load up the Stopwatch Project.
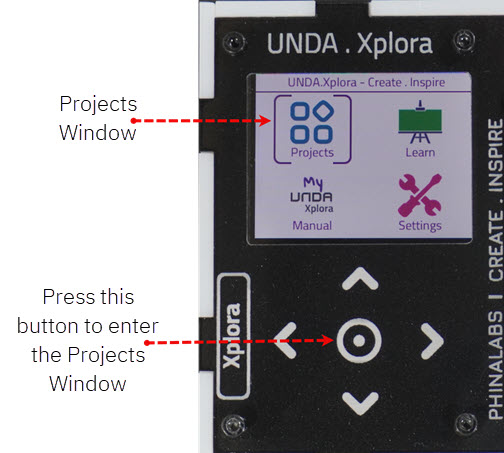
Open Project
From the main window open the projects