xPlora: Fan
Introduction
We all love cooling off on a hot day. A fan is one of my favorite appliances at home. We love fans because they keep us cool, freshen up a room, and make hot days much more bearable… but what I really like about fans is how they spin; the smooth, steady blades whirling round and round. With fans installed in our homes, offices, schools, and even outdoor spaces, they are not only functional but also fascinating to watch as they rotate with rhythm and grace.
Fans are built in such a way that their motor turns the blades continuously, creating a gentle airflow that cools the surroundings. Some fans are designed to change speeds or oscillate from side to side, spreading the breeze across a wider area. When observed closely, it's amazing how something so simple can make such a difference in comfort and atmosphere.
Build the project
In this section we will explore how to use UNDA.Xplora to build a simple electrical fan.
Components
To build the project you will need:
| Component | Description |
|---|---|
| 1 x Motor |  |
| 1 x pushbutton |  |
| 1 x resistor(10 kilo-ohm) |  |
| 4 x jumper wire |  |
| 1 x breadboarding jumper wire |  |
| 1 x battery connector |  |
| 1 x battery |  |
| 1 x Unda Xplora |  |
Step 1
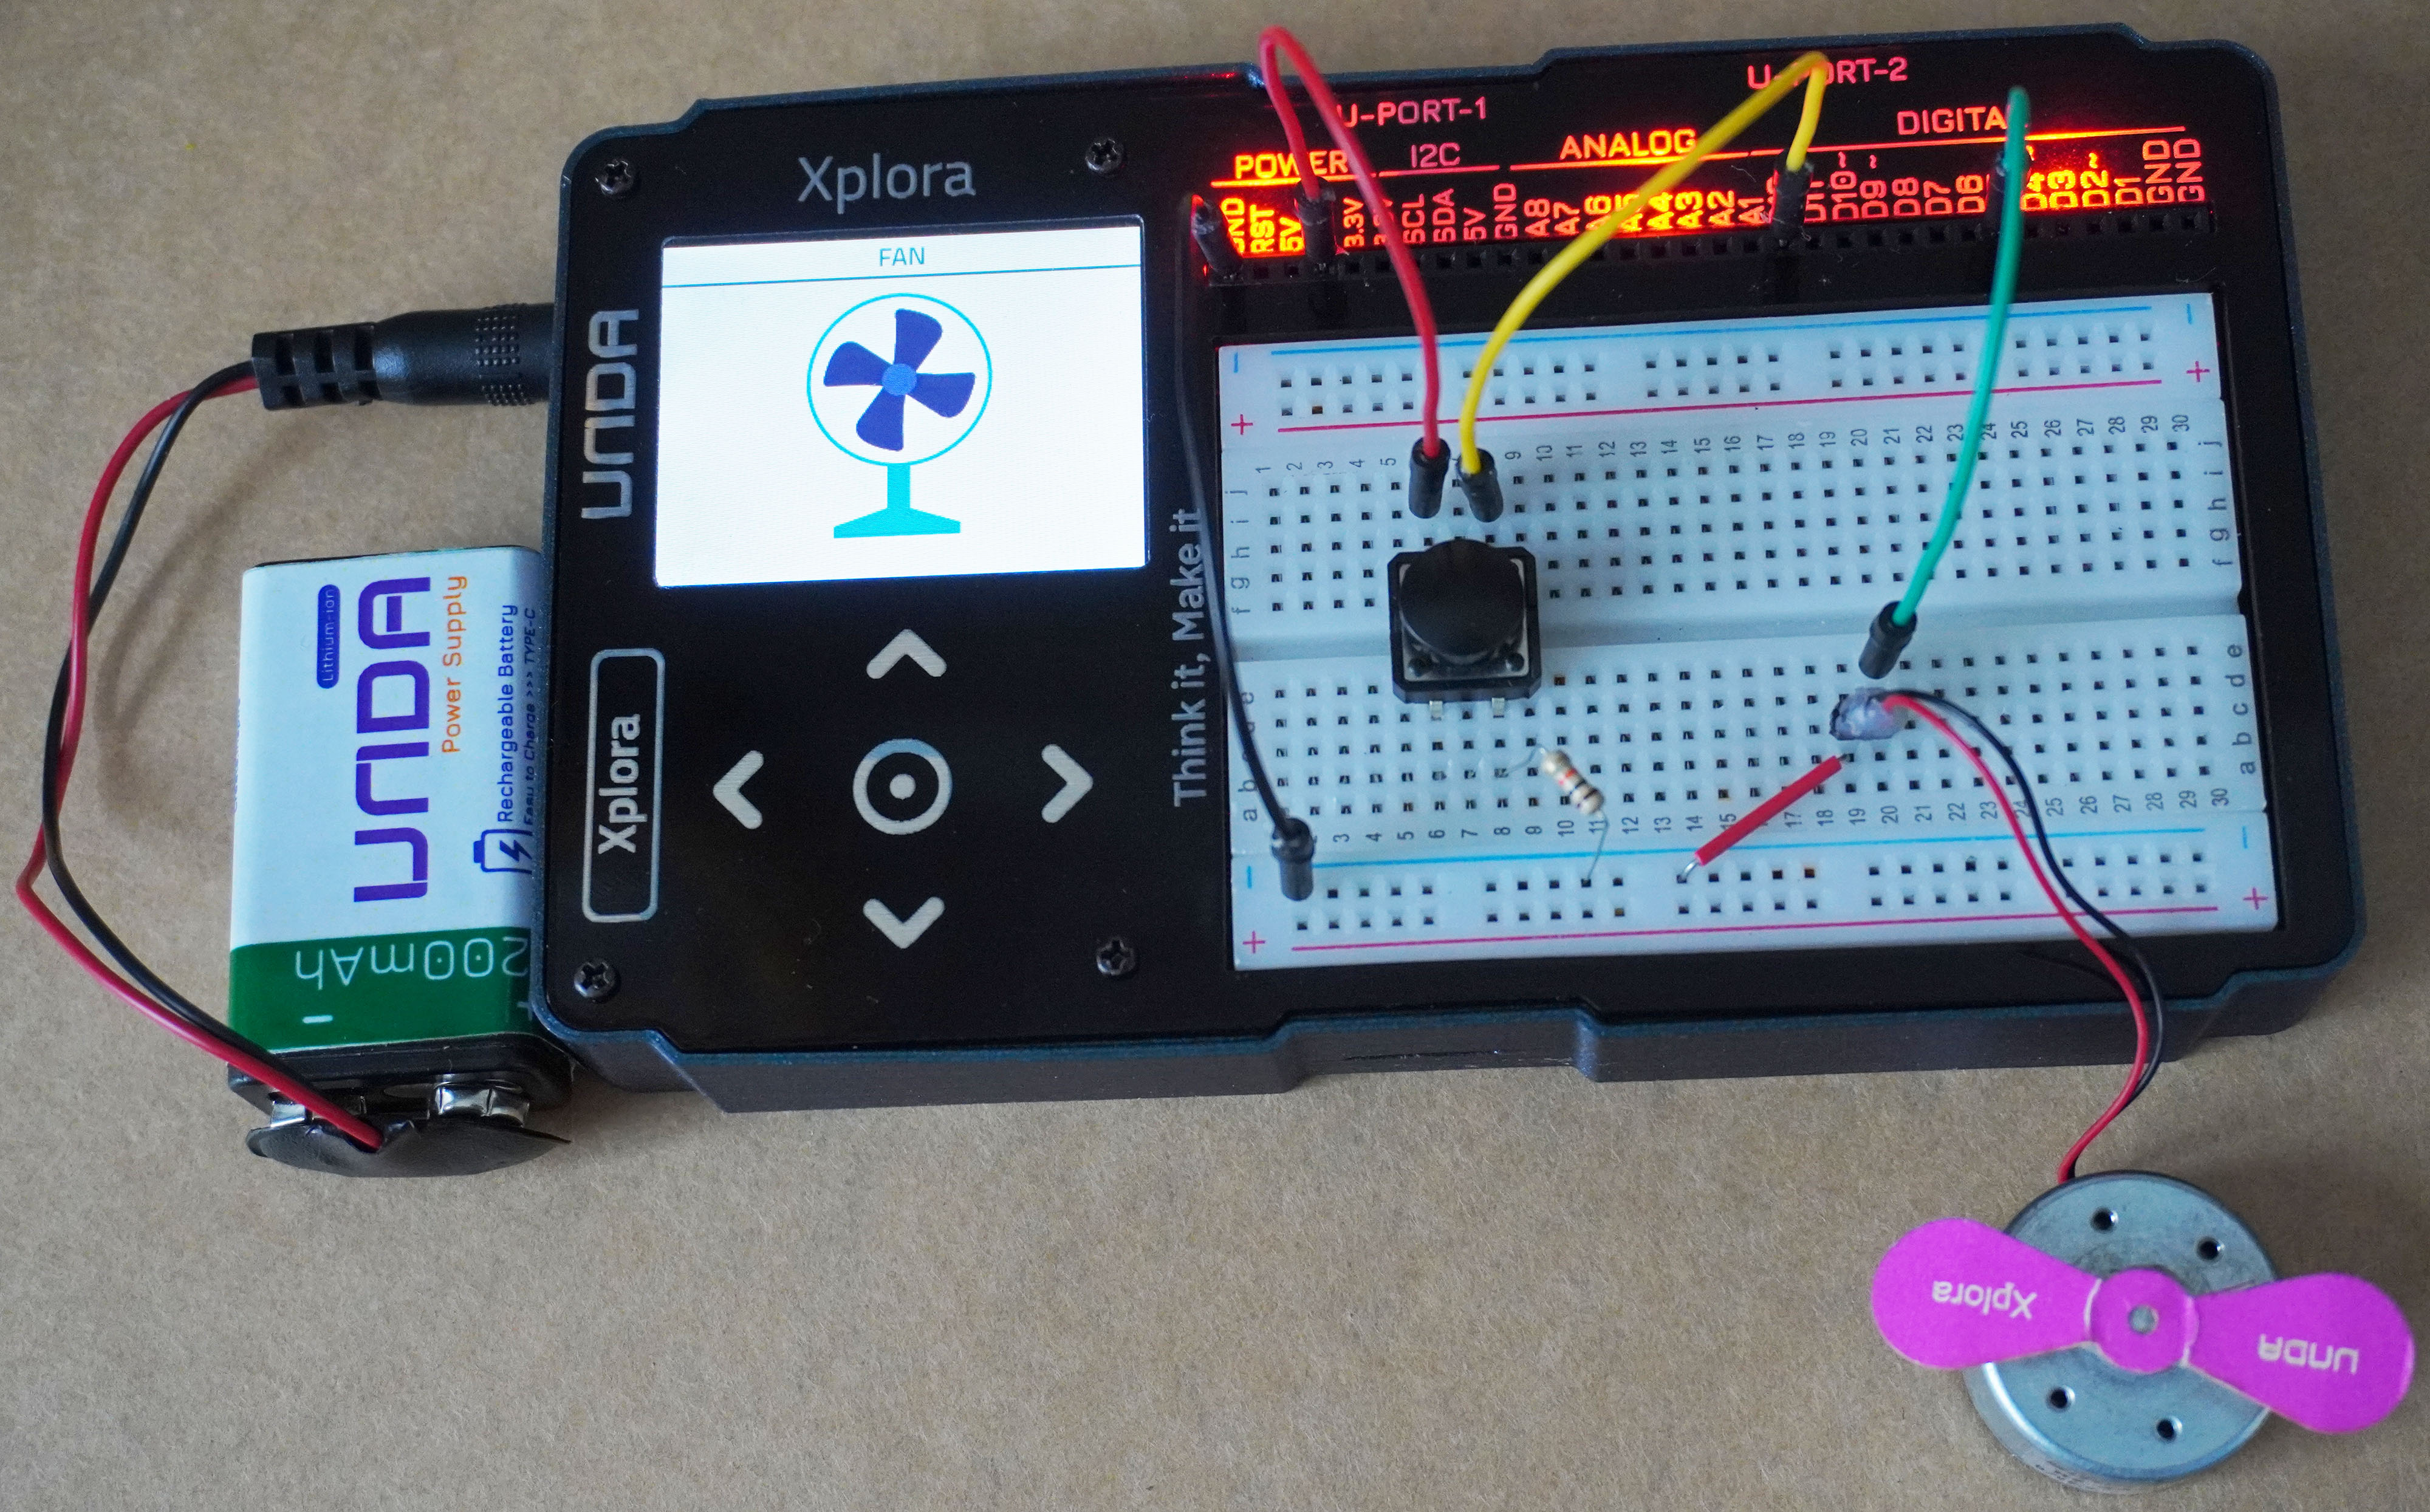
Connecting the Motor on the Breadboard
- Step
- Build
- Placing the Motor: Take the motor from the components casing. Take note that the motor has two polarities; positive (marked by red wire) and negative (marked by black wire). Connect the positive pin to breadboard pin c20 and the negative pin of the motor to pin c19. The two pins of the motor are right next to each other, so when you insert one pin, the other wire should easily go into the breadboard next to the first pin. However, ensure the correct wire goes into the correct pin to maintain proper polarity.
Step 2
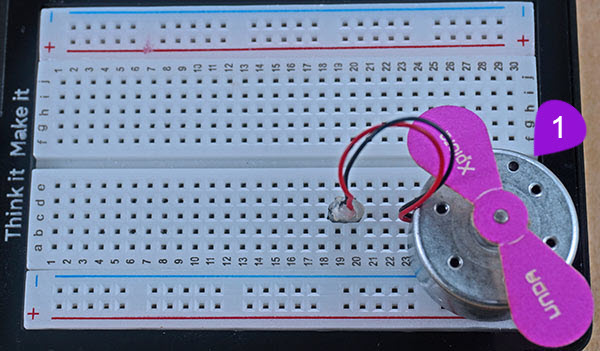
Wiring the Motor
- Step
- Build
-
Connecting to Digital Pin D5: Take one jumper wire of any color of your choice from the compinents casing. Connect one end of the jumper wire into digital pin D5 and then insert the other end of the jumper wire into breadboard pin e20.
-
Connecting to Ground (GND) Pin: Take another jumper wire and connect one end of the wire into any GND pin of your UNDA.Xplora. Take the other end of the jumper wire and insert it into any pin of the bottom negative breadboard rail.
-
Connecting to negative of motor: Using a breadboarding jumper wire, insert one of its' ends into any pin on the bottom negative breadboard rail. Connect the other end to breadboard pin b19 next to the negative pin of the motor.
Step 3
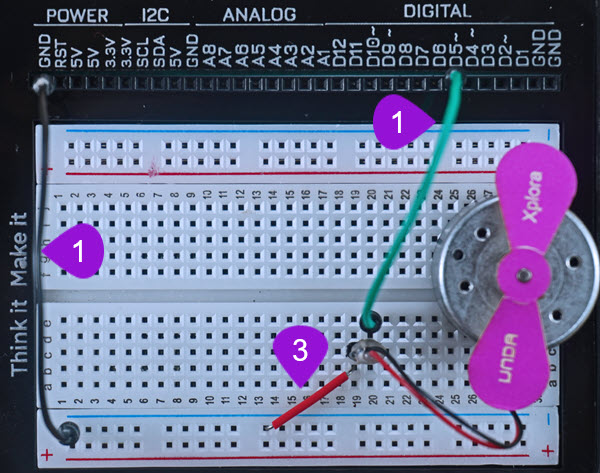
Connecting the pushbutton
- Step
- Build
-
Connecting pushbutton: Take one pushbutton and connect it's two top pins into pin g20 and pin g22. Insert the two bottom pins into pin d20 and pin d22. It is worth noting that as long as the top pins are inserted correctly, the bottom pins will easily insert into their respective pins.
-
Connecting a 10Kilo-ohm resistor: Take one 10 Kilo-ohm resistor and connect one of its' end into any pin of the bottom breadboard rail. Insert the other end into **breadboard pin b8 ** next to one of the bottom pins of pushbutton.
-
Connecting the button to digital pin D12: Using a jumper wire(pick any color of your choice), connect from digital pin D12 to one side of the pushbutton at breadboard pin i8 of the breadoard.
-
Connecting the button to 5V: With another jumper wire, connect one of its' ends from any 5V Pin of the UNDA.Xplora and connect the second end of the wire into breadboard pin i6.
Run the Project
Once you have finished buidling the project, power the kit on and follow the steps below to load up the Fan Project.
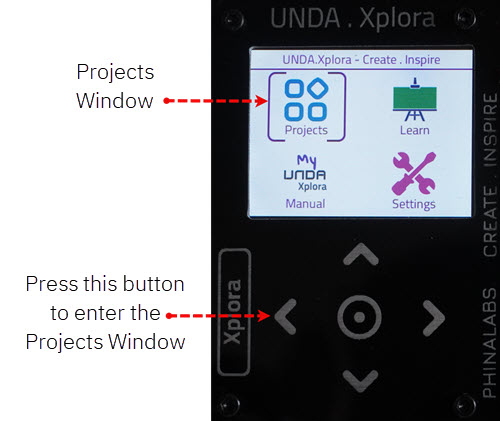
Open Project
From the main window open the projects
Observation
Pressing the button will start the motor and it will rotate like a fan. In the Play Section, you will see that this rotation has been animated to mimic that of an electric fan. Whne you press the button again, the motor stops rotating.